| Welcome, Guest |
You have to register before you can post on our site.
|
| Online Users |
There are currently 447 online users.
» 3 Member(s) | 440 Guest(s)
Applebot, Bing, Facebook, Google, FrankJScott
|
|
|
| Silksong Guide: How to Open the Ornate Lock and Beat The Unravelled |
|
Posted by: xtameembb - 09-28-2026, 05:08 AM - Forum: My Forum
- No Replies
|
 |
As of 2026, Hollow Knight: Silksong continues to reward curious players who stray from the critical path, and few optional secrets are as easy to miss as the ornate lock mechanism hidden inside Whiteward. The device sits behind a keyhole, silent and unexplained, during Act 2. Because it is not tied to the main story, the game offers no tutorial, no marker, and no obvious hint about what lies beneath. So how does a traveler turn that stubborn lock into a doorway? The answer requires a return trip, a late-game movement ability, and a key that most players will overlook on their first pass through the Citadel.
A Locked Door in Whiteward
The journey begins during the climb to the top of the Citadel. To enter Whiteward, players need the White Key, which is found in the top-right part of the Citadel in Songclave. After collecting it, they can ring the bell in the First Shrine if they wish, then return to the elevator and ride it down. Once inside Whiteward, they should take the left passage. There, the ornate lock mechanism waits, demanding a keyhole item that is not yet in the inventory. At this point, the correct move is simple: ignore it and continue the main story.
Progression eventually leads to the Underworks, where players earn the Clawline ability on the eastern side. This tool is the missing piece. Without it, the Surgical Key cannot be reached, and the lock remains a decorative mystery. With it, the optional boss arena becomes accessible.
Finding the Surgical Key ?
After acquiring Clawline, players should return to Whiteward. The route is specific. They need to make their way to the right, just before the drop into the lava pit that leads into the Underworks. Up above that area, a secret passage is hidden on the top level. Going left from there reveals an enemy and a grapple point. By using Clawline on that point, players can trigger an item drop: the Surgical Key.
It is a small detour with a large payoff. The key must then be carried back to the ornate lock mechanism. Inserting it causes the floor underneath to open, dropping the player directly into The Unravelled's boss arena.
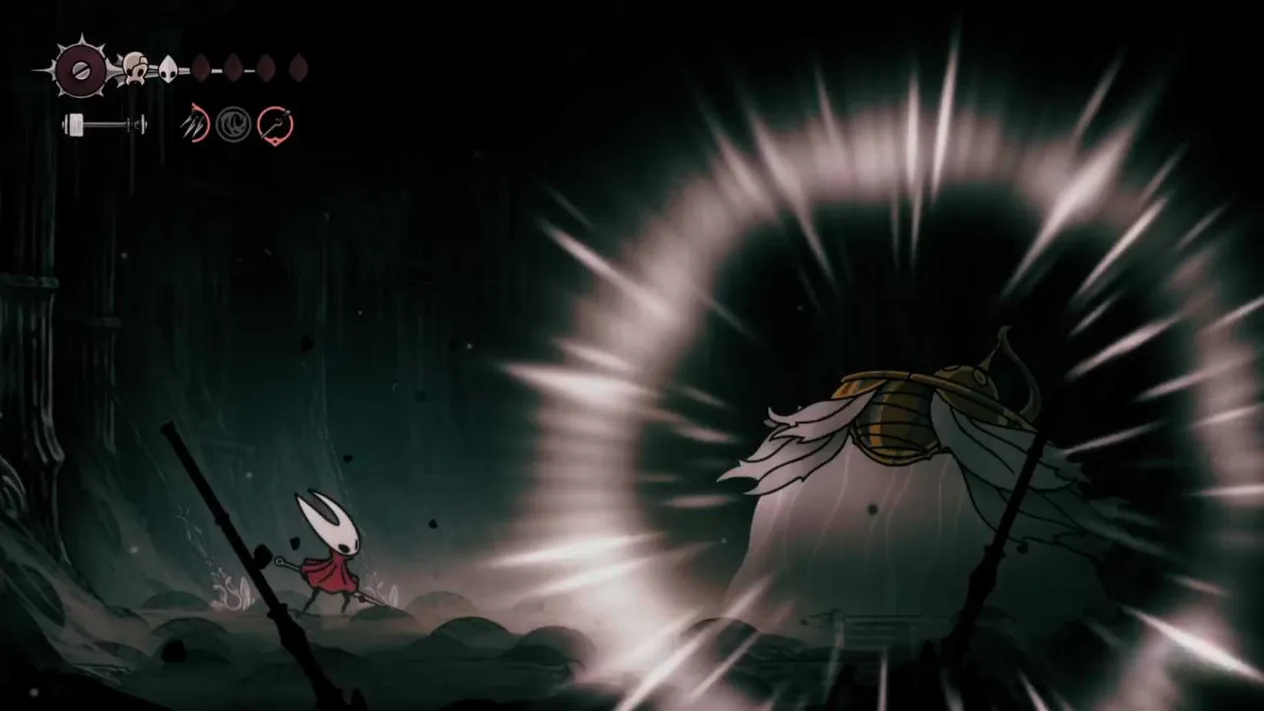
The Unravelled Boss Fight
The Unravelled does not begin as a solo duel. The encounter opens with a single enemy. Once that enemy is defeated, two more spawn. Only after those additional foes are dealt with does the actual boss make his appearance. It is a layered fight, and players who waste resources on the first wave may find themselves struggling before the main event even starts.
The boss has only three attacks in his arsenal, but each one punishes careless positioning. He deals two mask damage, so contact is costly. Players should avoid standing on the ground where he emerges. The Unravelled usually opens with a charge attack. The good news is that he can be attacked during this move. The safer response is to jump and dash out of the way, then strike him from behind before he dives into the ground.
After reemerging, he will either perform another charge or launch projectiles that can be hit. As he takes enough damage, he begins summoning spears from the ground before diving back down. In the later stages, he can start a charge attack while the spears are still active. That overlap is the real threat. Keeping calm, maintaining distance, and punishing only safe openings will carry the fight.
Phase
What Happens
Player Response
Opening
One enemy appears
Clear it quickly
Second Wave
Two enemies spawn
Manage spacing and silk
Boss Intro
The Unravelled enters
Avoid his emergence point
Charge
Boss rushes across arena
Jump, dash, hit from behind
Projectiles
Boss fires hittable shots
Strike them or dodge
Spears
Ground spears appear
Stay mobile, avoid charging boss
Reward
Silk Heart
Collect and exit
Why the Reward Matters
Defeating The Unravelled grants a Silk Heart. For completionists and players chasing every upgrade, this makes the ornate lock worth opening. It is not required for the main story, but it is another example of Silksong hiding meaningful rewards behind environmental puzzles and ability gates.
So is the detour worth it? For anyone who enjoys the game's exploration, yes. The lock mechanism is a reminder that not every secret announces itself. Sometimes the only hint is a keyhole, a hidden passage, and the patience to come back later with the right tool.
Quick Recap ✅
Reach Whiteward in Act 2.
Get the White Key from Songclave in the Citadel.
Ride the elevator down and find the ornate lock on the left passage.
Continue the story until Clawline is obtained in eastern Underworks.
Return to Whiteward and go right before the lava pit drop.
Find the top secret passage, go left, and use Clawline on the grapple point.
Collect the Surgical Key and unlock the mechanism.
Defeat The Unravelled's waves and boss.
Claim the Silk Heart.
In 2026, this remains one of the more satisfying optional secrets in Silksong. The path is obscure, the boss is dangerous, and the reward is permanent. For players who thrive on discovery, that combination is exactly what makes the hunt worthwhile.
That same patience — checking back later, keeping a mental note of something worth returning for — translates surprisingly well outside the game. Plenty of players who enjoy hunting down obscure secrets also enjoy hunting down a good price, and the two mindsets aren't so different: you watch for the right moment, you avoid impulse purchases, and you accept that the best opportunities rarely announce themselves up front.
If that sounds familiar, it's worth keeping a deals hub bookmarked alongside your usual gaming stops. Sites like DealNest round up discounts and offers in one place, which saves you from refreshing a dozen store pages during sale season. Whether you're restocking on accessories or picking up something new to play once the credits roll, a little browsing beforehand can be the difference between paying full price and walking away satisfied — the same feeling as finally opening that ornate lock.
|

|
|
| Silksong: I Unlocked the Choral Chambers Stage Door and Fought Trobbio |
|
Posted by: xtameembb - 09-28-2026, 03:49 AM - Forum: My Forum
- No Replies
|
|
I still remember the first time I laid eyes on that locked door in Choral Chambers. It was just above the Grand Bellway, bottom-right of the zone, and I could see a golden lever mocking me from the other side. Hornet could not reach it. No amount of wall-clinging, dash-slashing, or desperate pogo tricks would do the job. That door is the entrance to The Stage, and behind it waits Trobbio, an acclaimed thespian who wants to use his theatrical performance to 'rouse the soul of this one great land.' If you are playing Silksong in 2026, this little detour is still one of the most rewarding side paths in the game. Let me spill the tea on how I got through it.
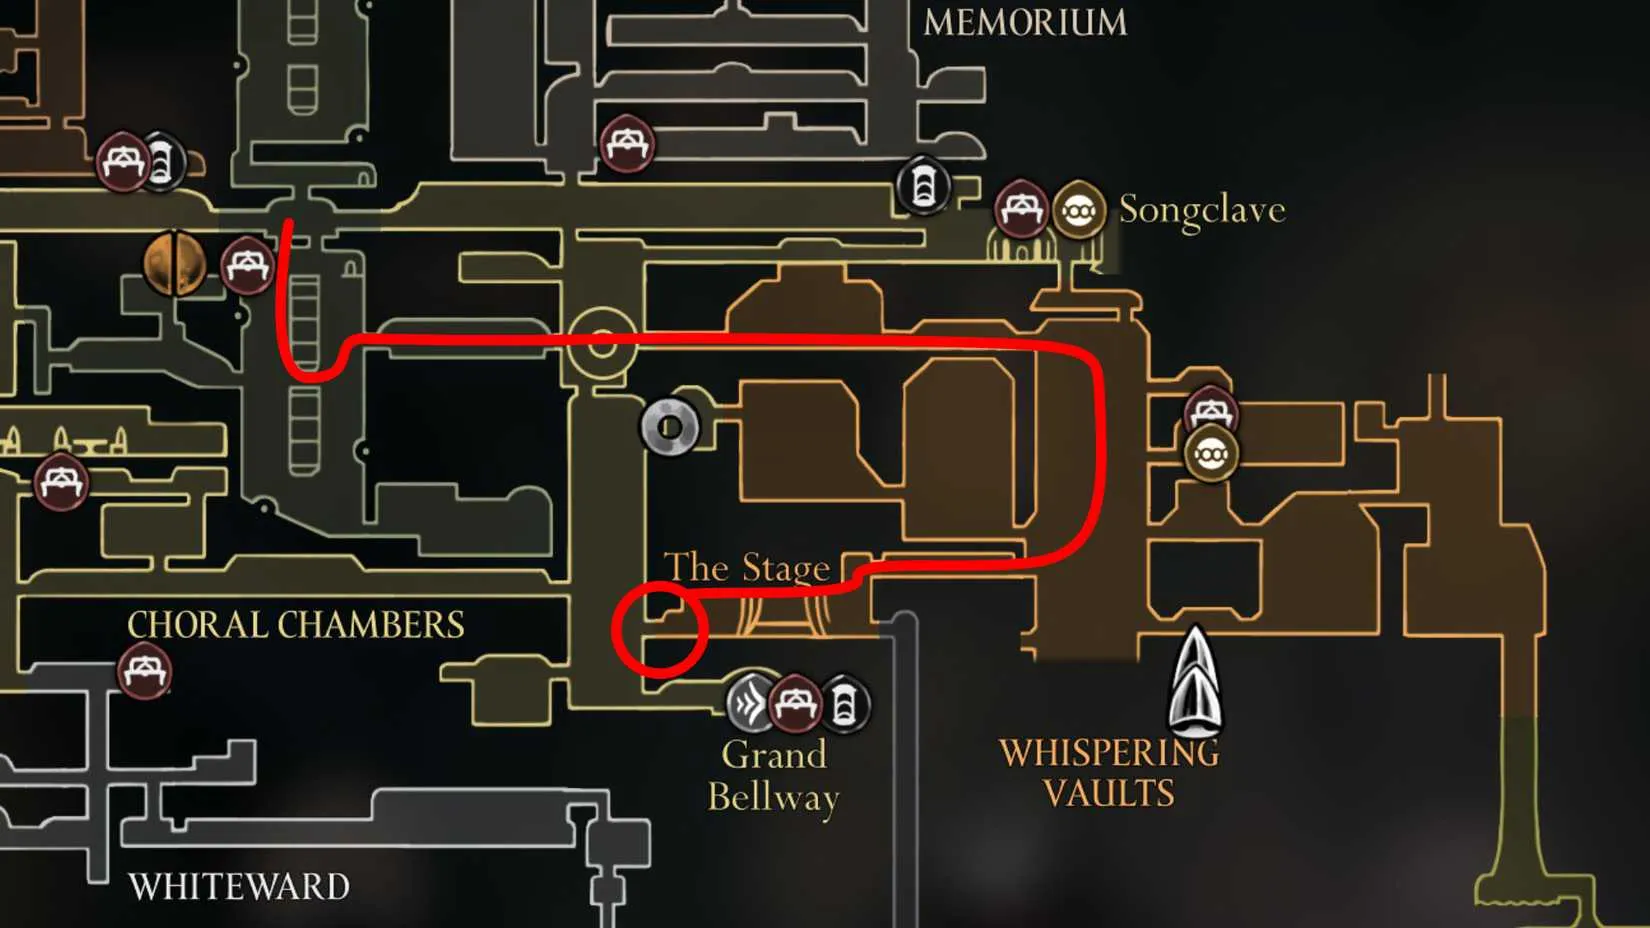
Why Bother With The Stage?
Beating Trobbio is not just about bragging rights. Once he is down, you get much safer access to the Whispering Vaults and the top-right side of the Underworks. The Grand Bellway bench is practically right below the boss room, so it becomes a convenient fast-travel anchor. In a game like Silksong, where a single wrong step can send you back to the last bench with a bruised ego, that is huge. It is the difference between a leisurely stroll and a sweaty-palmed gauntlet every time you need to pass through.
The Long Way Around
The lever that opens the Stage door is on the far side. You cannot reach it from Choral Chambers. Period. You have to go all the way around through the Whispering Vaults and enter the boss room from the right side. Here is the route I used, step by step.
Step
What To Do
Danger Level
1
From the Cogwork Dancers arena (where the three ancient statues now sit after you beat the boss), head down into the Cogwork Core.
Low
2
Carefully navigate to the right side of the room. If you do not have the shortcut unlocked, go all the way down, then around the bottom of the central wall.
Medium
3
Continue right, pogo-ing across more gears, until you enter a room with a lever.
High
4
Hit the lever to turn the gigantic wheel-gate horizontal. This connects the top of Choral Chambers to the Bellway area below.
Low
5
Continue right to enter the Whispering Vaults.
Medium
6
Attack boxes to push them along tracks in the background, then continue into the room on the right.
High
7
In the enormous, labyrinthine room, aim for the exit on the left about two-thirds of the way down.
Very High
8
Dodge flame-tossing enemies, gigantic armored bugs, and rapid slashing enemies while solving box puzzles.
Very High
9
Continue left, then drop down into the top layer of The Stage.
Medium
10
At the end of the hallway, drop down near the door. Do NOT enter the boss arena yet. Hit the lever to unlock the locked door to The Stage.
Low
11
Go back to the Grand Bellway and sit on the bench to set your respawn point.
Breathe
That last step is not optional. I repeat: do not be a hero. If you skip the bench and die to Trobbio, and you sat at any bench on the way through the Cogwork Core or Whispering Vaults, you will have to make a much longer trek back. Trust me, I learned that the hard way. My pride still has not recovered.
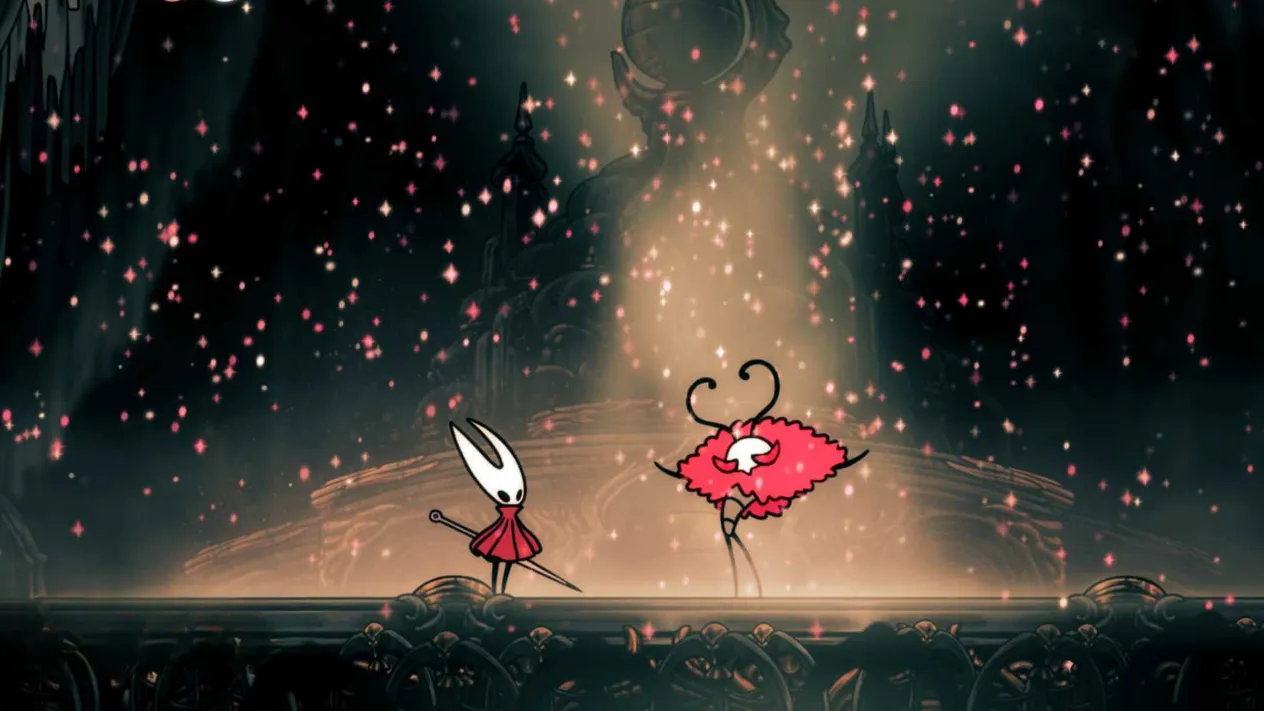
Whispering Vaults: Box Puzzles and Bullet Hell
The Whispering Vaults section is no joke. Those box puzzles are cute until you are getting peppered by flame projectiles and rushed by armored bugs the size of a small house. I found that patience is the real weapon here. Push the boxes one at a time, keep your distance from the slashing enemies, and do not get greedy with hits. If you are using a spell-heavy build, save your Silk for emergency healing. If you are a pogo purist, may the odds be ever in your favor.
The labyrinthine room is the worst offender. It is huge, and the exit you need is on the left, about two-thirds down. I marked it on the map image above because I got lost twice. Twice! In 2026, with all the guides and patches, I still managed to take the scenic route through every wrong hallway. Do not be like me. Keep an eye on the map, hug the left side when you can, and drop down only when you are sure.
The Final Lever and Boss Prep
Once you drop into the top layer of The Stage, you are almost there. Follow the hallway left, drop down near the door, and hit that lever. The locked door in Choral Chambers now opens from the other side. Now go back to the Grand Bellway bench. Sit. Relax. Maybe stretch your fingers. Then return to The Stage and show Trobbio what a real performance looks like.
Trobbio himself is a theatrical nightmare. He is fast, he is flashy, and he loves to punish greedy attacks. I will not spoil his full moveset, but bring your best tools: a fully upgraded needle, plenty of Silk, and maybe a shield charm if you have one. The reward is worth it: safer access to the Whispering Vaults and the top-right Underworks, plus the satisfaction of wiping that smug grin off his face.
So there you have it. The locked door in Choral Chambers is not a bug, a tease, or a developer prank. It is a gateway to one of Silksong's most memorable boss fights and a major convenience shortcut. In 2026, this route is still the way to go. Now go unlock that Stage door, and do not forget the bench. Your future self will thank you. ??️
Speaking of rewards that are worth the wait, there is one other place where a little patience pays off: buying the game itself. If you have been holding off on picking up Silksong, or you want to grab it on a second platform for a co-op run, prices bounce around constantly between storefronts, and refreshing five tabs during every seasonal sale gets old fast. That is exactly the gap game price tracker fills over at DealNest — it keeps an eye on listings across the major stores so you can see at a glance whether the current deal is genuinely the lowest it has been, or just marketing noise dressed up as a discount.
Grabbing a copy at the right moment is the same instinct as sitting on that bench before a boss fight: a tiny bit of foresight that spares you a much longer, more painful trek later. So whether you are buying your first copy or double-dipping, it is worth a quick look at DealNest before you hit checkout.
|
|
|
|
| My Complete Journey Through Hollow Knight: Silksong's Choral Chambers |
|
Posted by: xtameembb - 09-28-2026, 01:53 AM - Forum: My Forum
- No Replies
|
|
I still remember crawling out of The Underworks after beating the Last Judge, only to be swallowed by the gilded nightmare of the Choral Chambers. If you skipped The Mist, this is likely your first real taste of the Citadel, and it is overwhelming. The halls are huge, the enemies are aggressive, and the secrets are packed into every ceiling and floor. As of 2026, this area remains one of the most complex zones in Hollow Knight: Silksong, so I want to walk you through the path I took, the shortcuts I opened, and the treasures I refused to leave behind.
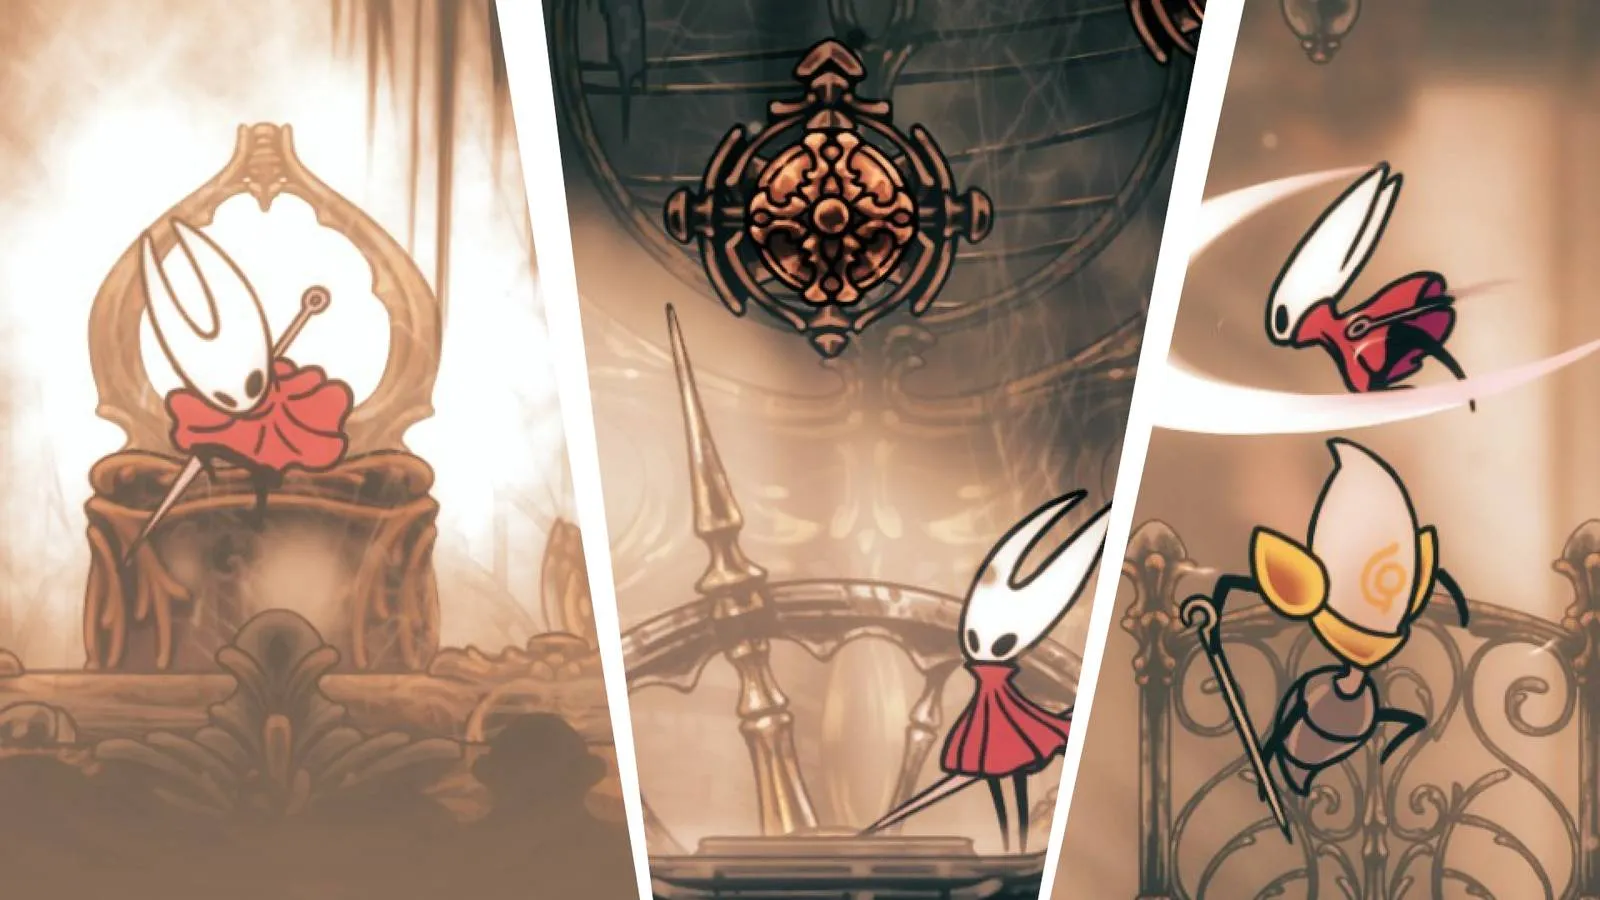
Lower Left-Side Halls ?
When I popped out of the hole at the top of the Underworks, I immediately headed left and found a free bench. That bench felt like a miracle. Further left, a big circular room offered a shortcut to the Grand Gate, but I went up and around instead. I activated a lever, grabbed a few shards from the obscured hatch on the left, and climbed higher for beads and a preview of the Ventrica Station. It was blocked from my side, so I kept moving right and paid for the map. That map changed everything. After opening a floor hatch, I dropped into a den of easy spiders, climbed out, and walked past dead Citadel residents until Lace appeared. She taunted me, the corpses rose, and I had my first real fight in the area. ⚔️
Central Left-Side Halls
The enemies here are not terrible, but I learned to respect the ones with red on their clothing. They swing wide or throw projectiles that caught me more than once. Since this is not a locked combat room, I left when my health got low. I entered the bottom right room and found an elevator blocked by a very particular key. I made a mental note and returned to the tall room. I platformed up, swatted away a sword enemy, and broke a window on the left. At first it looked empty, but I jumped up the wall and looted a dead body for a Rosary Bead. Back in the main tall room, I headed up and to the upper left exit, where enemies and Rosaries waited. The top was blocked, so I continued left.
Far Left-Side Halls
After fighting through more enemies, I took the left door, jumped across spikes, and chose to drop down instead of visiting The Slab. That drop led me to the Citadel Spa. It looked disappointing at first, just a couple of showerheads, but I broke the floor in the first room. Beneath it was an underground steam pipe system. No hidden items, but it contained an entrance to the secret area of the spa. That route connects the leftmost side of the map to the middle and became very convenient for a later quest. I then headed left, fought silk-strung enemies, hit a lever, and went down. I grabbed Rosaries, entered a big room through its upper right segment, and let the optional enemies spawn. I left or beat them, dropped down and right, and found a chest packed with Rosaries. Further down and right, I finally activated that Ventrica Station. Once it became my hub for the Citadel, I understood why these stations are a godsend. ?️
Large Left-Side Drop
I opened the shortcut and returned to the tall room where I had taken a left to the Ventrica Station. Heading up, I entered the upper left exit and found Silk dispensers. Not useful. Up the timed platforms, the next room had bells and a pressure plate. I had to repeat the pattern they rang out. If you do not want to memorize it, here is the cheat sheet I used:
Pattern
Bell order (left to right)
First
1, 5, 4, 6
Second
3, 6, 5, 1, 7
Third
2, 4, 6, 3, 5, 1
After that, I received a Cogheart Piece. Up more timed platforms, I headed right and had to jump with strict timing while dodging an enemy. I lured the enemy to the starting platform, killed it, then jumped across for my prize. Up even more timed platforms, the top left entrance had a winged swordsman guarding Grindle. There was nothing else in the room, but everyone loves Grindle, right? ?
Central Left-Side Drop
At the top right room, I dropped down and fought the genuinely tough enemies. I jumped left for extra Rosaries as a reward, then timed my jumps to the right into another massive room. I broke the wall directly to the right, dropped for Silk, and acknowledged the big saw blades I could not pass. I fell down carefully, avoiding the golden spikes, and broke the cracked wall on the right. That let me flick a lever, go back up, soar past the saws, and save a flea. I returned to the bottom, opened a shortcut to the tall room that started this whole route, and headed right into a cramped hallway. Past the tattered curtains, I found a fly-infested room, went up, and glimpsed rare Pale Oil. I could not break that wall yet, so I went to the top right, grabbed a Silkeater, and left. Falling back down the tall room and going right, I finally reached the top right entrance and another bench. ?
Lower Middle Halls
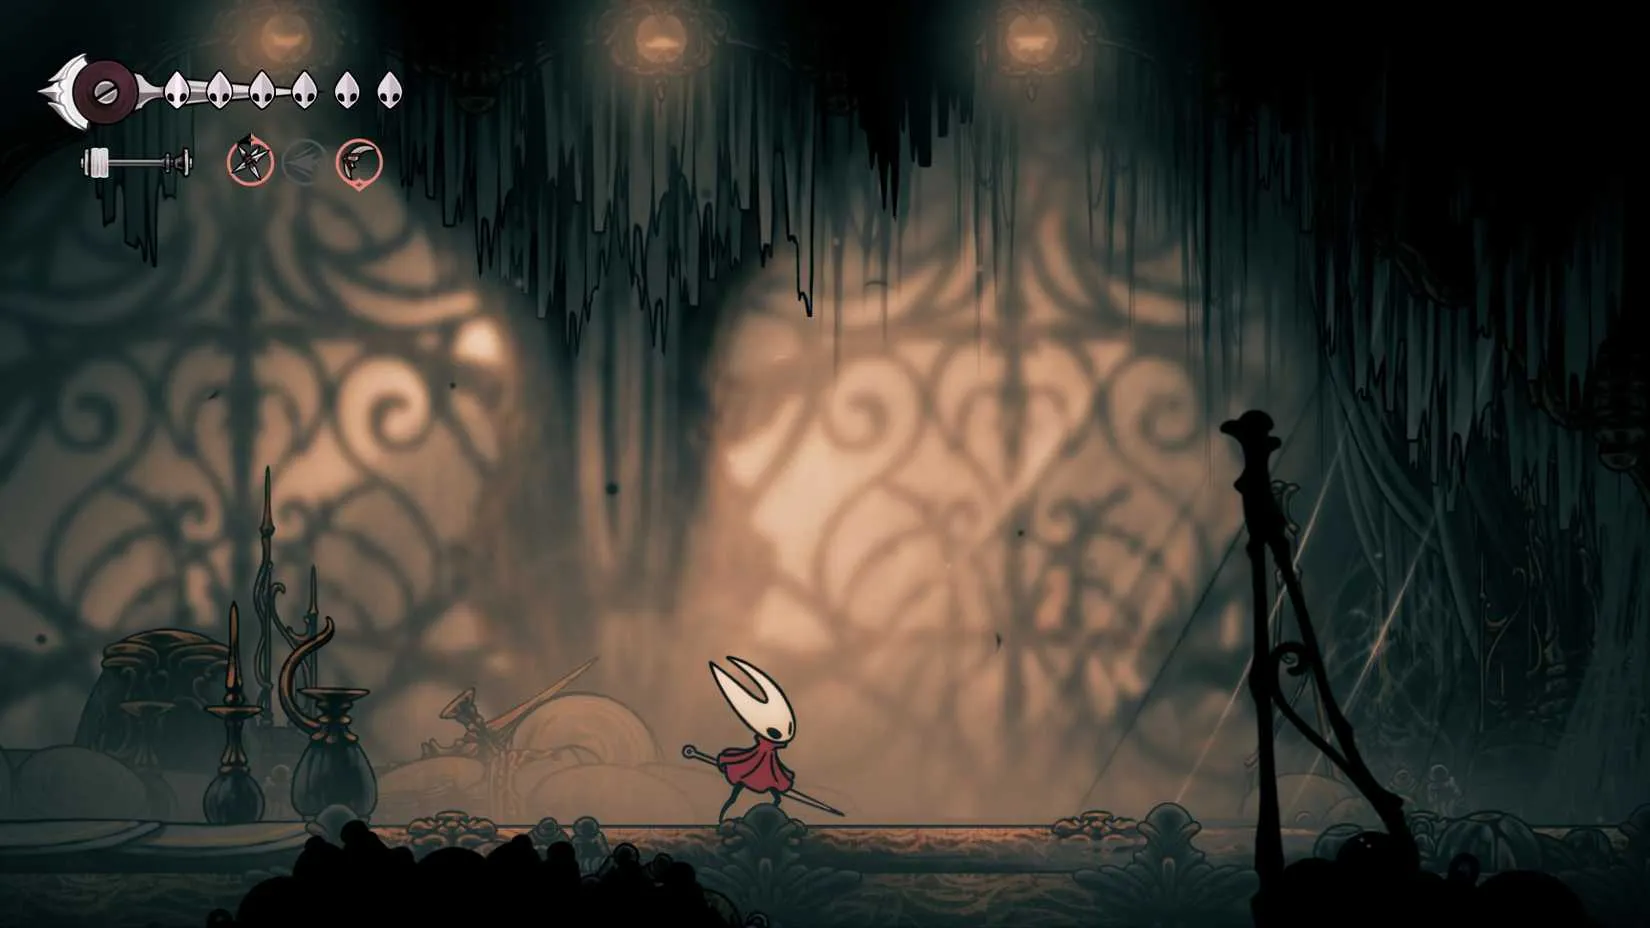
From that bench, I headed right, opened the hatch, and prepared for spiders and steam. Every path here coalesces at the bottom right and leads into a long, straightforward hall. I went left first to open a shortcut to the left-side halls. The area to the right had moving cogs and a flying mechanical bug, but it was light work. The end of the hallway was packed with enemies that love heavy blows. I used a few hit-and-run attacks and cleared them.
Lower Right-Side Halls
As soon as I entered the room on the right, I dropped all the way down and opened the Grand Bellway. I bought the bench and the Ventrica Station beside it. This was incredibly handy, because trekking out of the Citadel and back to the rest of Pharloom is arduous. The room up and to the left was not special. I dodged spikes, took out two thieves, and broke cocoons for a Silkeater. I also entered the door above the Bellway, but there was only a little lore. Further up, I broke glass blocking an entrance marked by three pins. Inside was another Pale Oil teaser and an easy way to escape enemies. I pogoed off bells, entered another dark cramped hallway, and found a big lever that turned a massive wheel with a hole in it. I turned it to go vertically and wall jumped up. I could head left for Silk dispensers, but who cares? ?
Upper Right-Side Halls
I pogoed off more bells and opened the top right door. The hallway required a few well-timed dashes, but it was straightforward. At the other end, I found a very big, regal-looking chapel. I went inside, rang the bell, enjoyed the free bench, and came outside to be chewed out by an old man. This began the town of Songclave, which gradually gains residents as you progress. At the very rightmost part of Songclave, I found the White Key. It opens the elevator we found long ago and leads to a smaller, separate area. For now, I headed back left and climbed all the way up. At the top, I activated another Ventrica station, which was incredibly useful throughout most of Act 2. I went down and left across an extremely long hallway with a glass floor and several beefy guards. A well-timed dive kick can bounce over them, but they drop a ton of money, so I tried killing them. Continuing left, I found an upper entrance I could not access without wings, and I headed down to unlock a shortcut. Be careful: going much further left throws you into the Cogwork Dancers boss fight. I geared up first, defeated them, opened the Cogwork Core, and headed to the upper left.
Upper Left-Side Halls
With those guards dispatched, I entered the top left area. I could go left, since the route upwards was locked, or descend to explore more of the Choral Chambers. I chose to descend first. The top two gates on the right are shortcuts out of the Cogwork Core, so I ignored them. I entered the top left gate by dropping in from above, and the lower left gate was already unlocked. Further down, I found two more gates. I could bypass the right gate by going underneath, but I could not find a way around the left gate. I dropped down, ran across the huge dining hall, and found the Royal Mergwin, who tasked me with a massive quest for Pale Oil. I opened the shortcuts, then climbed back up to the room left of the Cogwork Dancers, behind a breakable wall. There, I started a big vertical platforming challenge on timed platforms and opened a treasure chest. My reward was seeing Grindle. This is much easier if you wait until you have wings. Further left, I found rings to grapple onto and climb. They led into High Halls proper and let me unlock the shortcut I had seen earlier. I grabbed the bench, and from there I had plenty of new places to explore, all connected to these chambers.
The Choral Chambers can feel like a maze, but once I opened the Ventrica stations, shortcuts, and benches, it became the beating heart of the Citadel. My advice is simple: buy the map early, respect the red-clothed enemies, solve the bell puzzle, and do not rush the Cogwork Dancers. Take the area one hall at a time, and you will turn this gilded labyrinth into your new home base. ?
When you’re not navigating a labyrinthine citadel, keeping your game library stocked without overspending can be its own challenge. New releases, indie gems, and classics all compete for the same budget, and prices fluctuate constantly across storefronts. DealNest makes that easier by gathering current deals in one place, so you can quickly see where to buy cheap games without hopping between a dozen tabs.
Whether you’re hunting for a metroidvania to scratch the same itch or simply want to clear your wishlist during the next sale, a quick check on DealNest before you buy can save you a surprising amount. It’s a practical stop for anyone who wants more time playing and less time overpaying.
|
|
|
|
| Reliable Ventilation with Mixed Flow Inline Fans |
|
Posted by: INTELLIFAN - 09-27-2026, 03:59 PM - Forum: My Forum
- No Replies
|
|
Choosing the right ventilation equipment is essential for maintaining consistent airflow and healthier indoor environments. INTELLIFAN, a ventilation and indoor air quality solutions brand from Greenland Solutions, develops practical air movement solutions for residential, commercial, and industrial applications.
As a Mixed Flow Inline Fan Manufacturer in India, INTELLIFAN focuses on ventilation equipment designed to support efficient air circulation through ducted systems. Mixed flow technology combines characteristics of axial and centrifugal airflow, making these fans suitable for applications where reliable airflow and pressure performance are important.
The product portfolio also includes inline duct fans, exhaust fans, fresh air ventilation systems, and Energy Recovery Ventilators (ERVs). These solutions can help remove stale air, introduce filtered fresh air, and support improved indoor air quality.
With manufacturing experience dating back to 2015, INTELLIFAN works with HVAC professionals, architects, dealers, and installers by providing product selection, ventilation sizing, technical guidance, and installation support for diverse projects.
|
|
|
|
| Cankiri Web Tasarim |
|
Posted by: Laplace - 09-27-2026, 02:54 PM - Forum: My Forum
- No Replies
|
|
İşletmeler için dijital dünyada güven veren bir ilk izlenim oluşturmak artık yalnızca estetik bir web sitesine sahip olmakla sınırlı değil. Ziyaretçinin aradığı bilgiye kolayca ulaşması, sayfaların hızlı açılması ve sitenin telefonda da sorunsuz çalışması büyük önem taşıyor. Çankırı Web Tasarım Ajansı olarak kurumsal web sitesi, e-ticaret, SEO, özel yazılım ve reklam yönetimi hizmetlerini tek çatı altında sunuyoruz. Türkiye genelinde yayına aldığımız 100’ün üzerindeki projeden edindiğimiz deneyimi Çankırı’daki işletmelerin ihtiyaçlarına göre şekillendiriyoruz. Her projede hazır kalıplar yerine markanın hedef kitlesini, hizmet alanını ve sektördeki konumunu dikkate alan bir yapı kuruyoruz. Tasarım kararlarını verirken yalnızca bugünü değil işletmenin ilerleyen dönemde ihtiyaç duyabileceği yeni sayfaları, kampanyaları ve içerik alanlarını da göz önünde bulunduruyoruz. Yönetilebilir bir altyapı sayesinde site büyüdükçe yeniden başlamak gerekmeden yeni ihtiyaçlara uyum sağlamak mümkün oluyor. Bu yaklaşım sayesinde Çankırı web tasarım hizmeti yalnızca bir internet sitesi hazırlamak yerine işletmenin dijitalde daha anlaşılır, güvenilir ve ulaşılabilir görünmesini sağlayan bütünlüklü bir çalışmaya dönüşüyor.
Bir web sitesinin ziyaretçi üzerinde bıraktığı etki çoğu zaman birkaç saniye içinde oluşur. Karmaşık menüler, yavaş açılan sayfalar ya da güncel olmayan bilgiler kullanıcıyı siteden uzaklaştırabilir. Bu nedenle projelerimizde sade tasarım, anlaşılır içerik yapısı ve teknik performansı birlikte ele alıyoruz. Mobil uyumlu arayüzler hazırlıyor, sayfa hızını önemseyen altyapılar kuruyor ve arama motorlarının içerikleri rahatça okuyabileceği metin yapıları oluşturuyoruz. E-ticaret projelerinde ürünlerin kolay bulunmasına, kurumsal sitelerde ise hizmetlerin açık biçimde anlatılmasına dikkat ediyoruz. SEO çalışmalarında yalnızca anahtar kelimelere değil kullanıcıların gerçekten aradığı bilgilere odaklanıyoruz. Site içindeki iletişim alanlarını da ziyaretçinin gereksiz adımlar yaşamadan işletmeye ulaşabileceği biçimde planlıyoruz. Formlar, hizmet sayfaları ve yönlendirmeler gerektiğinde sadeleştiriliyor; böylece kullanıcı deneyimi daha akıcı hale geliyor. İçerik güncellemeleri sitenin güncelliğini koruyor. Böylece Çankırı web tasarımı süreci görsel açıdan hoş bir site üretmenin ötesine geçerek markanın dijital görünürlüğünü destekleyen ölçülebilir ve uzun vadede geliştirilebilir bir altyapı haline geliyor.
Çankırı Web Tasarım Ajansı ile çalışırken süreç uzaktan hızlı ve şeffaf şekilde ilerler. Projenin hangi aşamada olduğunu bilir, ihtiyaç duyduğunuzda sitenizde güncelleme talep edebilir ve teslim sonrasında da dijital varlığınızı geliştirmeye devam edebilirsiniz. Web tasarımın yanı sıra SEO, reklam yönetimi ve özel yazılım çözümlerinin aynı ekip tarafından yürütülmesi farklı hizmetler arasında kopukluk oluşmasını önler. Özellikle dijitalde yeni bir başlangıç yapmak isteyen ya da mevcut sitesini yenilemek isteyen işletmeler için doğru teknik temel büyük avantaj sağlar. Proje boyunca ihtiyaçların açık biçimde konuşulması sonradan ortaya çıkabilecek belirsizlikleri azaltır ve işin daha düzenli ilerlemesine yardımcı olur. Yayın sonrasında performans, içerik ve yeni ihtiyaçlar doğrultusunda yapılabilecek geliştirmeler için de sürdürülebilir bir yapı bırakıyoruz. İnternette web tasarım Çankırı araması yapan potansiyel müşterilerin karşısına daha profesyonel bir marka algısıyla çıkmak güven oluşturmanın ilk adımlarından biridir. Amacımız; hızlı çalışan, kolay yönetilen, ziyaretçiye ne sunduğunuzu net biçimde anlatan ve işletmenizin hedeflerine uyum sağlayan web siteleri hazırlayarak dijitalde kalıcı bir temel oluşturmaktır. Ücretsiz fiyat teklifi için webtasarimcankiri.com tıklayın.
|
|
|
|
| Burdur Web Tasarim |
|
Posted by: Laplace - 09-27-2026, 12:04 PM - Forum: My Forum
- No Replies
|
|
Burdur’da faaliyet gösteren işletmeler için internet sitesi müşterinin marka hakkında ilk kararını verdiği önemli bir temas noktasıdır. İyi hazırlanmış bir site güven verir, hizmetleri anlaşılır biçimde sunar ve iletişime geçmeyi kolaylaştırır. Burdur Web Tasarım Ajansı; kurumsal web sitesi, e-ticaret, SEO, özel yazılım ve reklam yönetimi hizmetlerini tek çatı altında sunar. Ekip görünüm kadar hız, kullanılabilirlik ve teknik altyapıya da önem verir. Burdur web tasarım hizmetlerinde amaç işletmenin dijitalde gerçekten işine yarayan ve uzun süre kullanılabilecek bir yapı kurmaktır. Bir web sitesinin başarılı olması için ziyaretçinin aradığı bilgiye birkaç saniye içinde ulaşabilmesi gerekir. Karmaşık menüler, yavaş sayfalar veya mobil cihazlarda bozulan tasarımlar, potansiyel müşterinin siteyi terk etmesine neden olabilir. Projelerde mobil uyum, açılış hızı, sade içerik düzeni ve kullanıcı deneyimi birlikte ele alınır. İşletmenin sektörü ve hedef kitlesi dikkate alınarak özgün bir yapı oluşturulur. Burdur web tasarımı çalışmaları markanın kimliğini yansıtan, ziyaretçiye güven veren işlevsel bir dijital vitrine dönüşür.
Arama motorlarında görünür olmak güçlü bir internet sitesinin önemli parçalarındandır. Güzel görünen fakat Google tarafından doğru okunamayan bir site, hedeflenen ziyaretçiye ulaşmakta zorlanabilir. Ajans içerik yapısını, sayfa başlıklarını, teknik kodlamayı ve SEO uyumunu proje aşamasından itibaren planlar. Metinlerin yalnızca anahtar kelime için değil, gerçek ziyaretçiye bilgi vermek amacıyla hazırlanması önemsenir. Web tasarım Burdur arayışındaki işletmeler için bu yaklaşım yalnızca site sahibi olmayı değil, dijitalde daha görünür ve ulaşılabilir olmayı da sağlar. Burdur Web Tasarım Ajansı’nın öne çıkan yönlerinden biri çalışma sürecinin şeffaf ilerlemesidir. Proje başlamadan önce ihtiyaçlar belirlenir, kapsam netleştirilir ve sürecin hangi aşamada olduğu işletmeyle paylaşılır. Çalışmalar uzaktan yürütülebildiği için Burdur’daki firmalara ve Türkiye’nin farklı şehirlerindeki işletmelere hızlı şekilde hizmet verilebilir. Yayın sonrasında içerik güncellemeleri, yeni sayfalar veya teknik geliştirmeler için destek alınabilir. Burdur web tasarım hizmeti tek seferlik bir çalışma değil işletmenin dijital gelişimine eşlik eden sürdürülebilir bir süreç olarak ele alınır.
Kurumsal web sitesi dışında e-ticaret altyapısı, özel yazılım çözümleri, SEO çalışmaları ve reklam yönetiminin aynı ekip tarafından sunulması işletmeler için avantajdır. Farklı işler için farklı firmalarla uğraşmak yerine dijital süreç tek merkezden yönetilebilir. Bu bütünlük iletişimi kolaylaştırırken marka dilinin farklı kanallarda tutarlı kalmasına da yardımcı olur. Burdur web tasarımı arayan işletmeler ihtiyaçlarına göre şekillendirilen altyapı sayesinde daha düzenli, hızlı ve ölçülebilir bir dijital yapıya sahip olabilir. Bugün müşteriler bir işletmeyle iletişime geçmeden önce internet sitesini inceliyor, hizmetleri karşılaştırıyor ve marka hakkındaki ilk izlenimini sürede oluşturuyor. Bu nedenle web sitesi, işletmenin dijital vitrini kadar satış ve iletişim sürecinin de aktif bir parçasıdır. Burdur Web Tasarım Ajansı; sade tasarım, güçlü teknik altyapı, SEO uyumu ve kolay yönetilebilir sistemleri bir araya getirerek uzun vadeli çözümler sunmayı hedefler. Web tasarım Burdur odaklı profesyonel bir çalışma markanın güvenilir görünmesine, müşterilerin bilgiye kolay ulaşmasına ve işletmenin çevrim içi dünyada daha sağlam bir yer edinmesine katkı sağlar. Bilgi için burdurwebtasarim.com tıklayın.
|
|
|
|
| Teeth Whitening in Himayatnagar | Ivy Dental Clinic Hyderbad |
|
Posted by: ivydentistry - 09-27-2026, 10:48 AM - Forum: My Forum
- No Replies
|
|
Brighten your smile safely and effectively with professional Teeth Whitening in Himayatnagar at Ivy Dental Clinic. Their skilled dental team utilizes advanced laser whitening technologies and clinical-grade bleaching agents to remove deep coffee, tea, smoking, and age-related stains in just one comfortable session. Unlike over-the-counter DIY kits, Ivy Dental provides personalized treatments that deliver noticeably whiter teeth while protecting enamel and minimizing tooth sensitivity. Perfect before weddings, special events, or daily confidence boosts, their painless whitening procedures offer fast, long-lasting results. Reveal a radiant, stain-free smile—book your professional teeth whitening consultation with Ivy Dental Clinic today!
|
|
|
|
|


